Customising Unreal Engine Split Screen with a simple plugin


The power and versatility of the Unreal Engine have revolutionised the gaming industry, enabling developers to create stunning digital worlds for players to explore. Among its many features, the ability to implement split screen functionality for multiplayer games has been a long-standing favourite in the eyes of many. Split screen gaming allows friends to gather around a single screen and engage in thrilling multiplayer experiences together. In this article, we want to talk about this functionality and how it can be customised using Unreal Engine Plugins.
Let’s start with a short introduction. Unreal Engine Split Screen is a feature allowing the rendering of multiple viewports in a single application window. It is commonly used, for example, in games with local multiplayer features. Unreal Engine supports split screen out-of-the-box, but the implementation is limited to some of the most popular layouts only. Sometimes, that’s not enough, and some of your projects may require a custom layout. This is the case, especially when it comes to different screen sizes for different players.
This topic is especially important for HMI (Human-Machine Interface) and automotive projects. Those projects often need multiple viewports in a single application to visualise all the needed information. Unfortunately, the default equally split screen used by most games would rarely ever fit the needs of an industrial application.
In this article, we want to show you how a custom Unreal Engine Split Screen layout can be achieved using plugins. Of course, there are other ways to achieve a similar result. You can get there, e.g., by editing the Unreal Engine’s source code directly. However, this approach requires rebuilding the whole engine, which is time-consuming and potentially troublesome. Adding the code directly to the project was also a possibility, of course, but utilising an Unreal Engine plugin makes it easier to reuse it in different projects.
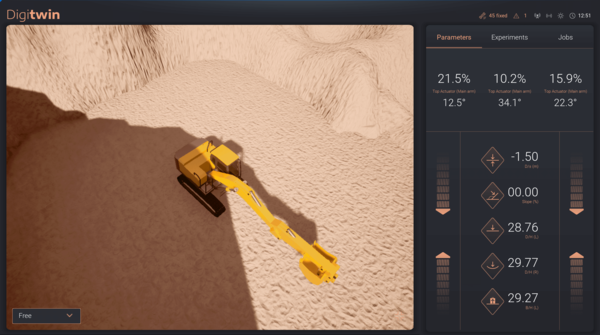
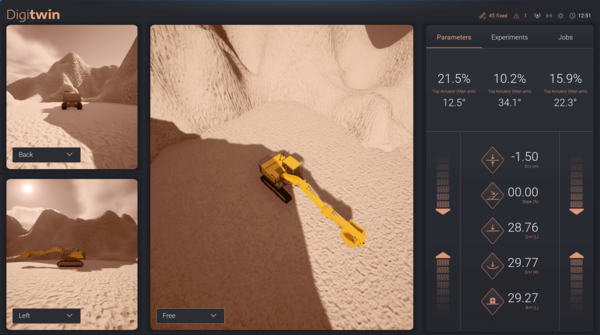
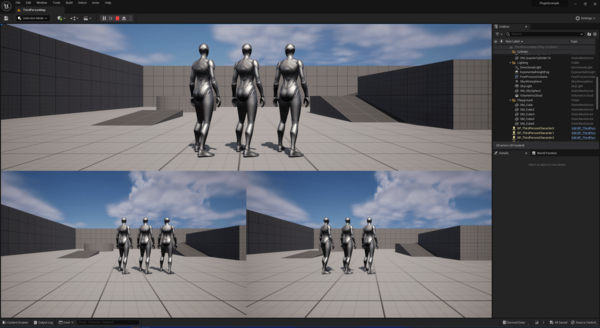
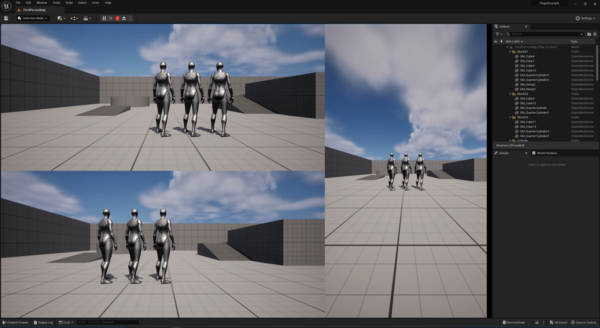
A real-life scenario of this approach would be our HMI DigiTwin project, where we wanted three viewports with an option of switching to a single one filling the whole area:
Without further ado, let’s jump right into how to do it.
How to customise the Unreal Engine Split Screen
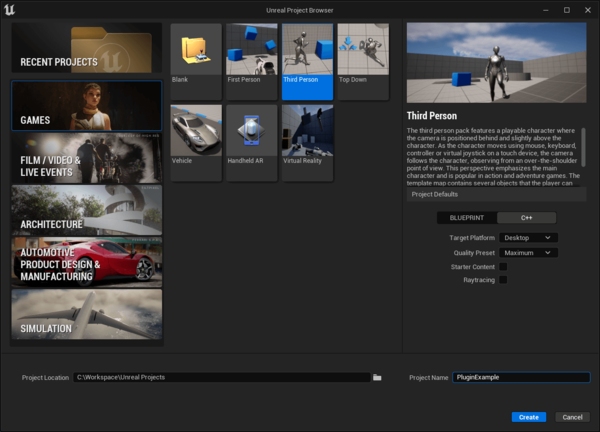
First, let’s create a new Unreal Engine project. Choose one of the templates or use an existing project (if you prefer).
Remember to enable C++ support.
Now we need to enable local multiplayer.
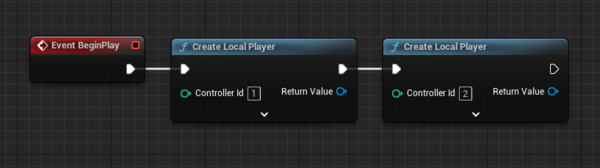
Open the level blueprint, just like in the screen below:

Create two additional players with controller Id 1 and 2:
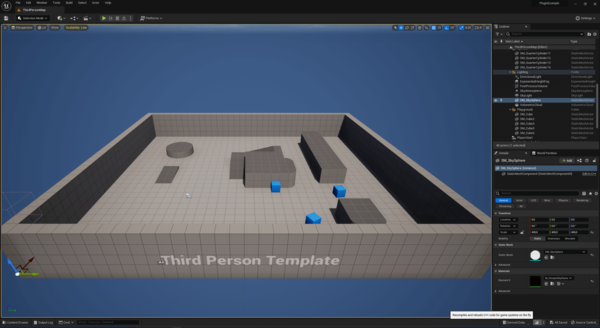
Run the project to check the result; default 3-player split screen will be used:
Create new plugin
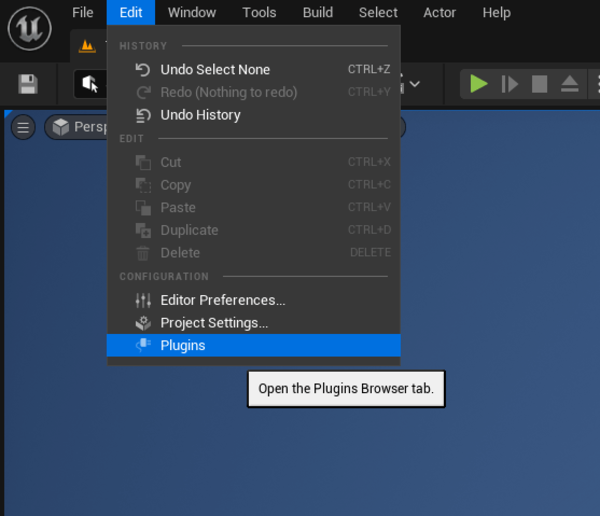
Open the Unreal Engine plugin menu by selecting Edit -> Plugins:
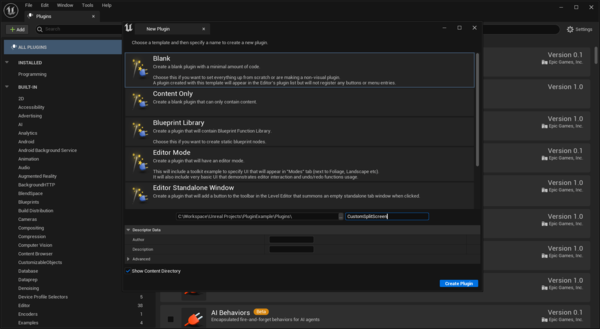
Press “Add”, then select “Blank” and input a name for your plugin. Confirm with the “Create Plugin” button:
Create new GameViewportClient implementation
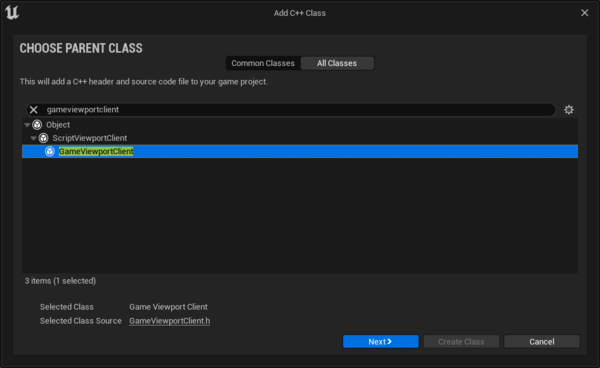
Select to Tools -> New C++ Class…, then switch to “All Classes” and select GameViewportClient as a parent.
Proceed by pressing “Next”:
Input a name for the new class (e.g., CustomGameViewportClient), and select the plugin as the target module from the drop-down list:
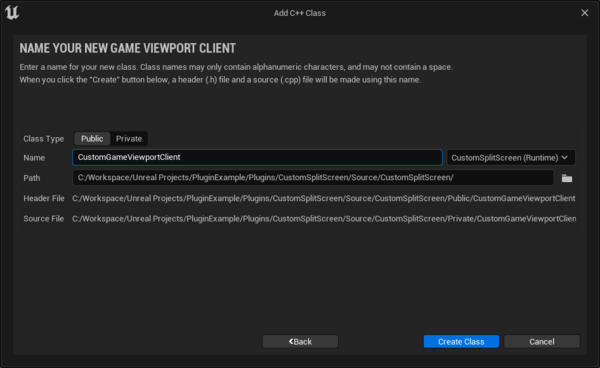
The building will fail for now; this is expected:
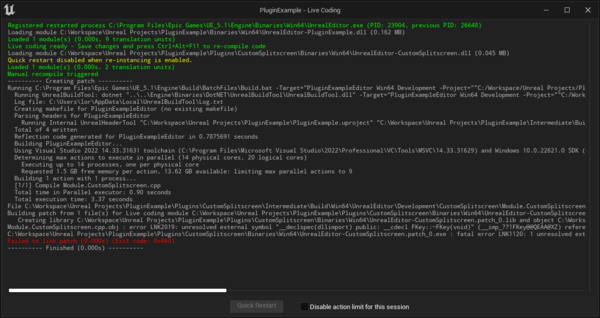
Fixing the linker issue
Switch to Visual Studio window; it should open automatically in the background by now.
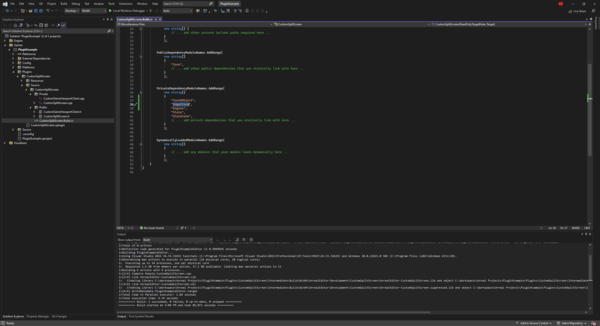
Navigate to PluginExample\Plugins\CustomSplitScreen\Source\CustomSplitScreen\CustomSplitScreen.Build.cs in the project tree.
Locate the “PrivateDependencyModuleNames” and add “InputCore” to the list:
Recompile with the Live Coding button in UE Editor:
Implement CustomGameViewportClient
Split screen configs are stored in UGameViewportClientSplitscreenInfo and indexed by ESplitScreenType::Type values.
Let’s declare an ID for our custom split screen config. In order to do that, define a new enum type CustomGameViewportClient.h based on existing ESplitScreenType values:
UENUM(BlueprintType)
namespace ECustomSplitScreenType
{
     enum Type
     {
          // 0 value required by UE
          None,
          // Custom Splitscreen, next value after last built-in splitscreen type
          ThreePlayer = ESplitScreenType::SplitTypeCount,
          SplitTypeCount
     };
}
Don’t forget to include the VieportSplitscreen header in the same file.
#include "Engine/ViewportSplitScreen.h"Next, let’s implement a constructor. In CustomGameViewportClient.h declare it under “public”:
UCustomGameViewportClient();Next, in the CustomGameViewportClient.cpp source file, implement the constructor as follows:
UCustomGameViewportClient::UCustomGameViewportClient()
     : Super(FObjectInitializer::Get())
{
     // Resize SplitscreenInfo to fit our custom config
     SplitscreenInfo.SetNum(ECustomSplitScreenType::SplitTypeCount, false);

     // Fill the custom config
     SplitscreenInfo[ECustomSplitScreenType::ThreePlayer].PlayerData.Add(FPerPlayerSplitscreenData(0.33f, 1.00f, 0.66f, 0.00f)); //1
     SplitscreenInfo[ECustomSplitScreenType::ThreePlayer].PlayerData.Add(FPerPlayerSplitscreenData(0.66f, 0.50f, 0.00f, 0.00f)); //2
     SplitscreenInfo[ECustomSplitScreenType::ThreePlayer].PlayerData.Add(FPerPlayerSplitscreenData(0.66f, 0.50f, 0.00f, 0.50f)); //3
}
After that, we need custom logic to select this new layout. This is implemented in the UpdateActiveSplitscreenType method.
We need to override it in our child class:
virtual void UpdateActiveSplitscreenType() override;And here is a basic implementation:
void UCustomGameViewportClient::UpdateActiveSplitscreenType()
{
     ECustomSplitScreenType::Type SplitType = ECustomSplitScreenType::None;
     const int32 NumPlayers = GEngine->GetNumGamePlayers(GetWorld());

     if (NumPlayers == 3)
     {
         // If Player count is equal 3, select custom Splitscreen
         ActiveSplitscreenType = static_cast<ESplitScreenType::Type>(ECustomSplitScreenType::ThreePlayer);
     }
     else
     {
         // Otherwise fallback to default behaviour
         Super::UpdateActiveSplitscreenType();
     }
}
Once again, compile with the Live Coding button in UE Editor.
Configure the project to use the newly created class
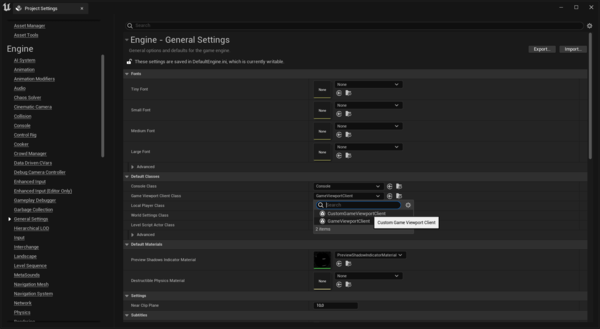
Open Edit -> Project Settings…,
Navigate to Engine -> General Settings, and find Default Classes -> Game Viewport Client Class
Or simply search for “Game Viewport” in the search box
Select CustomGameViewportClient from the drop-down list.
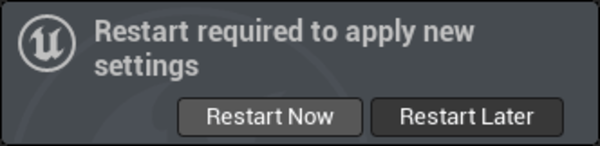
UE Editor will ask to restart; go ahead:
Run the project and check the final result:
Summary: Use the plugin to customise Unreal Engine Split Screen
This is, of course, a very basic example; the logic and layouts can be way more complex. You can create custom layouts depending on the number of players, increase the maximum number of players beyond default 4, or even move and resize the viewports in runtime (by overriding UGameViewportClient::LayoutPlayers()).
We hope this article serves as an inspiration to what is possible. The code for the plugin created for this article is available to download here.
Need support with development using Unreal Engine? Our team is ready to help you. Visit our HMI development services page for more information.
FAQ
Yes. Unreal Engine allows you to customise split screen layouts, but the default options are limited. To create more advanced layouts, you can override the GameViewportClient class and define your own viewport arrangement. In the article, we demonstrate how to do this using a lightweight plugin instead of modifying the engine source code.
Using a plugin keeps your project modular and easier to maintain. Instead of editing Unreal Engine’s core code, you implement the custom logic inside a separate module. This approach makes updates safer and allows the split screen functionality to be reused across projects.
GameViewportClient is responsible for managing viewports in Unreal Engine. By creating a custom class derived from GameViewportClient, you can override how viewports are created, positioned, and rendered, enabling fully customised split screen layouts.
Custom split screen layouts are useful when the standard layouts do not match the needs of your application. This can happen in simulation environments, HMI systems, or multiplayer projects where different viewports need different sizes or arrangements.


arrow_circle_rightContact us
Need support with development using Unreal Engine? Our team is ready to help you

Przemyslaw Krzywania
HMI Director
arrow_circle_right Other articles


